



What is the single biggest fear holding marketing teams back from upgrading their website? For most digital leaders, it comes down to organic search equity. You have spent years building keyword rankings, acquiring quality backlinks, and earning authority across search engines. The thought of losing all that hard-earned traffic during a website migration is enough to keep anyone up at night.
 Yet staying stuck on a clunky, slow, or outdated Content Management System (CMS) carries a high cost of its own. Older systems often slow down marketing campaigns, demand constant developer help for basic page edits, and fail to connect smoothly with your customer database.
So how do you switch to HubSpot CMS to gain fast editing, personalized content, and seamless CRM tools without losing your organic search visibility?
The answer lies in careful planning and strict execution. Replatforming your website does not have to result in ranking drops. By using a clear CMS migration checklist, you can move your site smoothly while preserving your domain authority, maintaining user trust, and preparing your content for modern search environments.
Why Do Unplanned CMS Migrations Risk Your SEO?
Before diving into the steps, it helps to understand what happens when a site changes homes. Search engines like Google rely on web crawlers to map out the structure of your website. These crawlers index your pages, follow your internal links, and read your header structures to decide where your content belongs in search results.
When you move to a new CMS, page locations often change. File pathways, image folders, and blog categories frequently take on new forms. If search engines encounter broken links or missing pages during this transition, they cannot evaluate your site correctly.
The financial consequences of unmanaged site migrations can be severe.
Search Engine Land's industry benchmarks show that,
Poorly executed website migrations routinely result in organic traffic drops of 20% to 40%.
In worst-case scenarios,
When URL maps are forgotten or staging pages are left indexed, companies can lose up to 80% of their organic search leads virtually overnight.
To avoid this outcome, you need a disciplined process. Let's break down the exact four-phase checklist you need for a smooth HubSpot website migration.
Phase 1: Pre-Migration Audits and Data Preparation
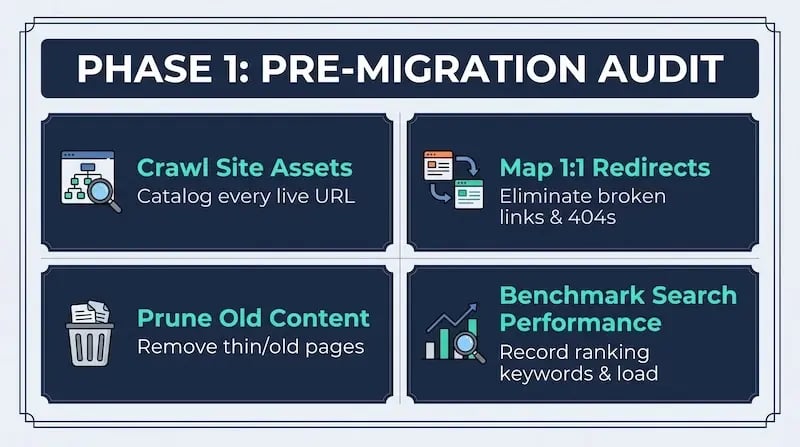
What hidden search assets are currently bringing traffic to your business, and how do you make sure none of them get left behind? Phase 1 focuses on gathering data, cleaning up your existing content, and setting up accurate redirect structures before touching any code inside HubSpot.
1. Run a Complete Website Crawl
Start by cataloging every single URL on your current website. Use site crawling tools like Screaming Frog, Ahrefs, or Semrush to generate a master inventory of your existing digital footprint.
Your crawl inventory must capture:
-
Every active webpage, landing page, and published blog post.
-
All media assets, downloadable PDFs, and hosted images.
-
HTTP status codes (200 OK, 301 Redirects, 404 Errors).
-
Meta titles, meta descriptions, image alt tags, and primary heading tags (
<h1>,<h2>). -
Current canonical tag settings.
2. Conduct a Thorough Database Cleanup
A platform change gives you an excellent opportunity to clean up digital clutter. Do not waste effort transferring low-value content into your clean HubSpot account. Review your content inventory to identify outdated blog posts, thin landing pages, or duplicate items that no longer serve your business goals.
Decide whether to keep, update, merge, or delete each asset:
-
Keep: High-performing pages that drive steady search traffic, leads, or sales.
-
Update: Pages with good potential that need fresh statistics, clearer formatting, or updated product details.
-
Merge: Multiple short posts covering the exact same subtopic that can be combined into one strong guide.
-
Prune: Outdated event pages, discontinued product announcements, or zero-traffic content that adds no value.
3. Build a Bulletproof 301 Redirect Map
301 redirect mapping is the single most important technical step in preserving your organic rankings during a CMS migration.
A 301 redirect tells search crawlers that a page has moved permanently to a new location, passing along the ranking authority and backlink equity from the original page to the new destination.
Create a simple spreadsheet with two primary columns: Old URL and New Destination URL.
Follow these basic guidelines for mapping:
-
Map pages on a strict 1-to-1 basis whenever possible. If your legacy contact page is:
-
[example.com/contact-us](https://example.com/contact-us), map it directly to [example.com/contact](https://example.com/contact).
-
-
Avoid redirect chains (where URL A points to URL B, which then points to URL C). Always point directly from the original URL to the final destination URL.
-
Never point all your old URLs to your homepage. Search engines classify lazy blanket redirects as soft 404 errors, which drops the search authority of those pages.
As noted in Google Search Central's official technical guidance,
Broken or mismanaged 301 redirects prevent search engine crawlers from transferring ranking signals efficiently, leading to immediate drops in search visibility.
Phase 2: Building and Testing Inside HubSpot CMS
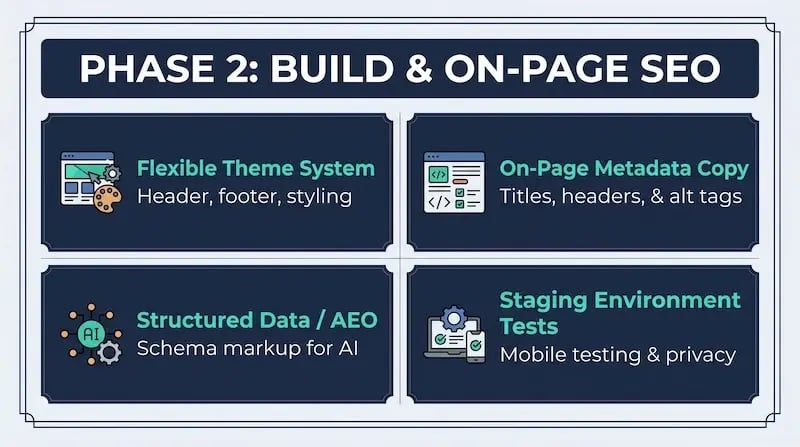
How do you recreate your visual branding while taking full advantage of HubSpot's drag-and-drop tools and fast loading speeds? Phase 2 focuses on building your page layouts, preserving on-page search metadata, and testing everything safely behind the scenes.

1. Build Reusable HubSpot Themes and Drag-and-Drop Modules
HubSpot CMS relies on flexible theme frameworks. Instead of copying hard-coded HTML pages from your old site, set up a custom theme with global headers, global footers, and standardized style rules.
Using a set of 15 to 20 custom drag-and-drop modules—such as hero sections, product grids, testimonial blocks, and call-to-action cards—allows your marketing team to build and edit pages quickly without breaking brand guidelines or page layouts.
 2. Preserve On-Page Metadata and Structure
When populating your pages in HubSpot, transfer your core on-page SEO elements with precision:
-
Meta Titles and Descriptions: Copy your exact meta titles and descriptions over to the new pages. Changing titles during a migration makes it hard to tell whether traffic changes stem from the new platform or from altered copy.
-
Heading Hierarchy: Maintain structured heading tags (
<h1>,<h2>,<h3>). Make sure every page features exactly one main<h1>heading containing your primary topic keyword. -
Image Alt Text: Ensure image file names and descriptive alt text move over cleanly to preserve image search visibility.
-
Answer Engine Optimization (AEO): AI-powered search tools like Google Overviews, ChatGPT, and Perplexity parse direct answers. Add clear, structured data (Schema markup) to your HubSpot templates for FAQs, articles, and product details so AI engines can easily digest and attribute your information.
3. Test Everything on Staging Domains
While building pages, work on a secure HubSpot staging domain. Ensure that staging sites use password protection or "noindex, nofollow" meta tags so search engines do not crawl or index draft versions of your pages before official launch.
Test page layouts across desktop computers, tablets, and mobile devices. Mobile performance is critical for organic rankings.
Statistics published by Statista show that,
Mobile devices account for over 58% of global web traffic, making mobile-friendly design a mandatory factor in search engine algorithms.
Phase 3: Domain Switchboard and Go-Live Execution
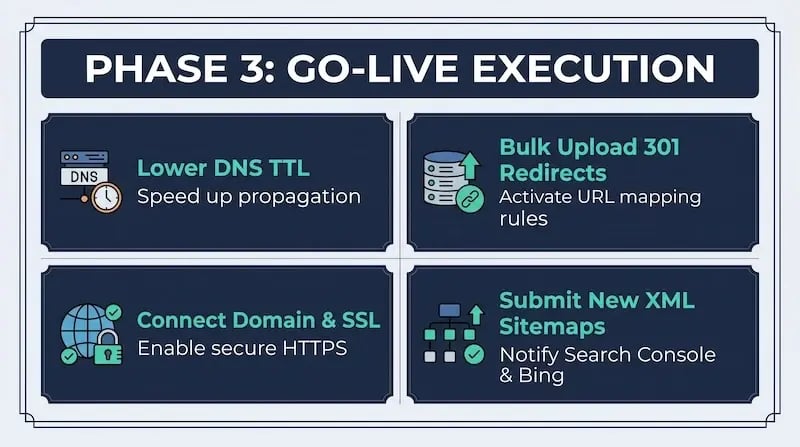
What technical steps ensure zero site downtime and instant search-crawler indexation on launch day? Phase 3 covers the tactical execution steps needed to take your new HubSpot website live smoothly.
 1. Update DNS Settings and Provision SSL
A few days before launch, log in to your domain registrar (such as GoDaddy, Namecheap, or Cloudflare) and lower the Time-to-Live (TTL) setting on your DNS records. Lowering the TTL value to 300 seconds (5 minutes) speeds up the time it takes for global internet servers to recognize your new domain settings on launch day.
Connect your domain in HubSpot's Domains and URLs settings, update your CNAME or A records as instructed, and verify that your free SSL security certificate is provisioned correctly. Secure HTTPS connections are required for both user safety and search rankings.
2. Bulk Upload 301 Redirect Rules into HubSpot
Before flipping the final domain switch, import your completed 301 redirect map directly into HubSpot's native URL Redirects tool.
-
Navigate to Settings > Content > Domains & URLs > URL Redirects inside your HubSpot portal.
-
Use the bulk upload CSV tool to import your mapping spreadsheet.
-
Select "Permanent (301)" as the redirect type.
-
Test several old URLs in a private browser window to confirm that they forward directly to the correct new HubSpot pages.
3. Publish and Submit Updated XML Sitemaps
Once your domain points securely to HubSpot, remove all staging blocks (noindex tags) and publish your pages.
HubSpot automatically builds an updated XML sitemap located at:
[yourdomain.com/sitemap.xml](https://yourdomain.com/sitemap.xml).
Copy this sitemap URL and submit it immediately to both Google Search Console and Bing Webmaster Tools. Request a priority re-crawl of your homepage and top traffic-generating pages to notify search engines that your site structure has updated.
Phase 4: Post-Launch Audits and Continuous Optimization
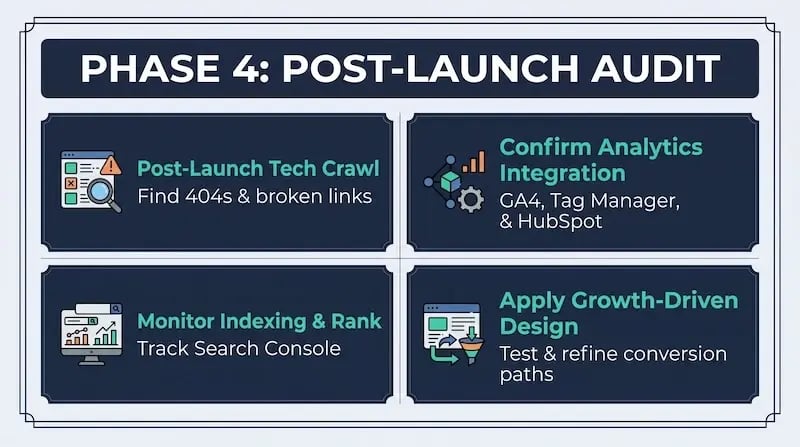
How do you catch and resolve tiny technical issues before they affect your keyword rankings? Phase 4 outlines the monitoring steps needed to protect your site during the first 60 days after launch.
1. Perform an Immediate Technical Post-Launch Audit
Run a fresh site crawl on your live domain within 24 hours of launch. This audit confirms that your migration executed cleanly and highlights any minor glitches.
Verify the following items:
-
Confirm that no live pages retain unwanted noindex meta tags.
-
Check that internal links point to clean new URLs rather than triggering 301 redirects internally.
-
Identify and fix any 404 page errors.
-
Verify that tracking scripts (Google Analytics 4, Google Tag Manager, pixels) fire correctly across all pages.
2. Monitor Google Search Console and Traffic Rankings
Keep a close eye on Google Search Console during the first two to four weeks post-launch. Review the Indexing and Page Experience reports daily to ensure search bots process your pages without friction.
Expect small traffic fluctuations during the first two weeks as search crawlers update their indexes. However, if page-level traffic or rankings drop significantly after 14 days, cross-reference your 301 redirect log to verify that destination URLs remain properly mapped.
3. Embrace Growth-Driven Design (GDD)
Going live on HubSpot is not the end of your website journey—it is the beginning of a better one. Rather than treating your site as a static project that remains unchanged for three years, adopt a Growth-Driven Design approach.
Use HubSpot's built-in analytics, heatmaps, and A/B testing tools to observe how visitors interact with your new layouts. Make small, data-informed adjustments to call-to-action buttons, lead forms, and copy layout over time. Continuous refinement builds a faster, higher-converting website that continuously fuels your business growth.
Summary CMS Migration Checklist
To help your team stay organized throughout the migration process, use this handy checklist summary:
| Phase | Milestone Task | Priority | Status |
|---|---|---|---|
| Phase 1:Pre-Migration | Run a full site crawl and record baseline SEO metrics | High | [ ] |
| Prune duplicate, thin, or outdated database assets | Medium | [ ] | |
| Create a 1-to-1 301 redirect map for all legacy URLs | High | [ ] | |
| Phase 2: HubSpot Build | Set up a custom HubSpot theme and reusable modules | High | [ ] |
| Transfer meta titles, descriptions, headings, and Schema | High | [ ] | |
| Test responsiveness and mobile speed on the staging domain | High | [ ] | |
| Phase 3:Go-Live | Lower DNS TTL values and provision an SSL certificate | High | [ ] |
| Bulk upload 301 redirect map into the HubSpot portal | High | [ ] | |
| Submit new XML sitemap to Google Search Console | High | [ ] | |
| Phase 4:Post-Launch | Run post-launch crawl to catch broken links or 404s | High | [ ] |
| Verify GA4, Google Tag Manager, and tracking codes | High | [ ] | |
| Review Google Search Console index reports weekly | Medium | [ ] |
Taking the Next Step in Your HubSpot Journey
Switching your website to HubSpot CMS is one of the smartest investments your company can make to streamline marketing workflows, align sales tools, and generate qualified leads. However, attempting a complex site migration without dedicated technical resources increases the risk of broken links, lost search authority, and expensive project delays.
You do not have to navigate this technical transition on your own. Working with an experienced HubSpot Certified Partner ensures that your website migration executes flawlessly—protecting your organic search traffic while giving your team a clean, drag-and-drop web presence built for growth.
At Aspiration Marketing, we take the complexity out of website migrations. We deliver fixed-price, rapid HubSpot CMS website migrations designed to transfer your web footprint without unexpected expenses or scope creep. From custom theme development and 1-to-1 301 redirect mapping to complete SEO preservation and post-launch verification, our certified architects handle every detail so you can launch with confidence.
Ready to upgrade your website to HubSpot without risking your organic search traffic?
Schedule a 15-Minute Migration Qualification Review with Aspiration Marketing today to discuss your project and receive a transparent, fixed-price quote.







Leave a Comment
Have thoughts on this article?
Share your feedback, ask questions, or join the discussion with our community.